


The following should help with setting up your Android device to use your idComm email. Please note that the screen shots below are from a Samsung Galaxy S3, so your screens may vary somewhat.
USERNAME / PASSWORD NOTE: Usernames and passwords are NOT optional, they are REQUIRED, despite what it may say in those fields on your Android device.
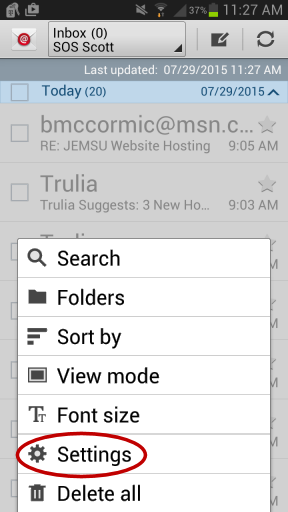
1) Open your email app, then tap the soft menu button. On the GS3 it’s at the very bottom left of the screen.
2) From the main menu select Settings.
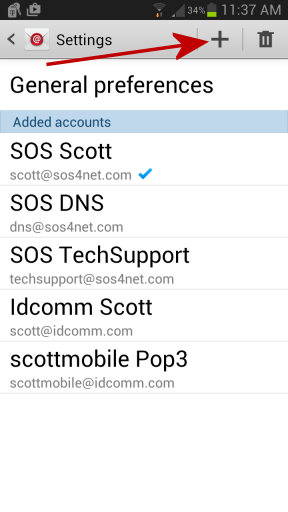
3) Settings / General Preferences
- Tap the + icon at the top right to create a new account.
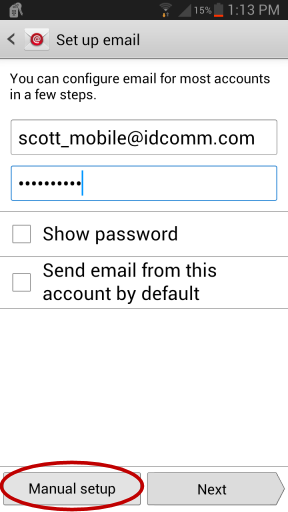
4) Set up Email
- Enter your full email address and password.
- Checking Show Password here makes entering the password easier.
- OPTIONAL: If you have no email accounts setup already (not counting GMail in its separate app) your idComm account will by the default account. If you do already have accounts, and you’d like to send mail from your idComm account by default, check the box to Send email from this account by default.
- Tap Manual Setup.
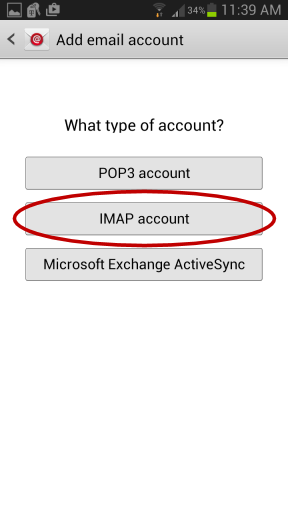
7) Type of account
- Tap IMAP account.
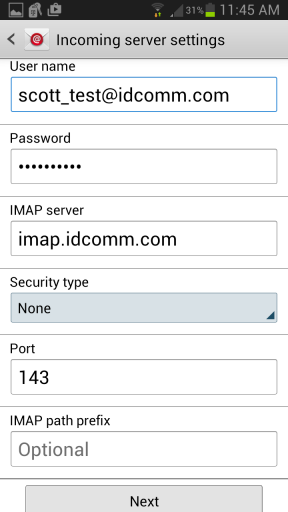
8) Incoming Server Settings
- User name is your full email address.
- Your password should already be entered for you.
- For IMAP server, enter imap.idcomm.com OR
- For Security Type, select None.
- For Port enter 143.
- Do not enter anything for IMAP Path Prefix.
- Tap Next.
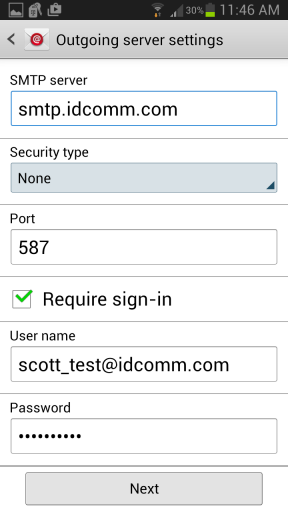
9) Outgoing Server Settings
- For SMTP Server, enter smtp.idcomm.com OR mail.idcomm.com (either will work).
- For Security Type, select None.
- For Port enter 587.
- Check the box for Require sign-in.
- User name is your full email address.
- Your password may already be entered for you. If not enter it now.
- Tap Next.
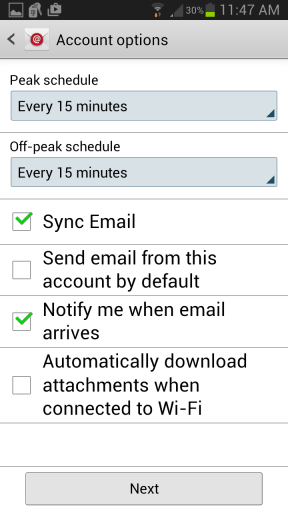
10) Account Options
The Account Options are strictly personal preference and have no bearing on whether of not your account actually functions properly. However they could make a difference in how its functionality is perceived. First make sure Sync Email is checked, or your phone may not check for new mail. If you want your phone to always check your email on an automatic schecule, make selections for Peak and Off-Peak mail checking frequency. If you want to be notified when new mail arrives, check that box. To receive email attachments automatically when connected to WiFi instead of having to tap something every time, check that box. When finished setting your options, tap Next.
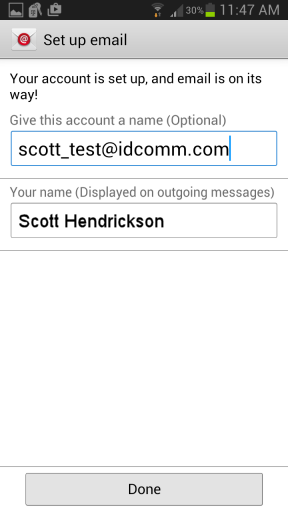
11) Set up email
You’re almost done! Just give the account a name to appear in the list of accounts on the General Preferences screen (we usually leave it as the email address itself) and enter your display name. This is usually your real name or a company name. When finished, tap Done.
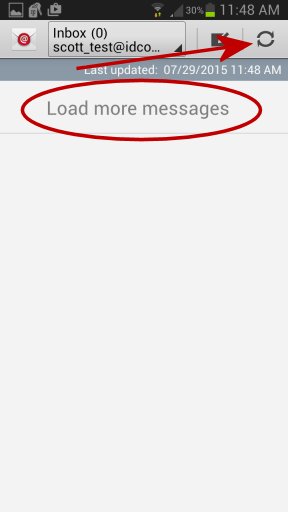
12) Your Inbox
After clicking Done, you should be taken to the Inbox for the new account you just created. If you need to manually tell it to check for new mail instead of waiting for the normal check interval, use the Refresh icon at the top right. Most mobile email programs only show a certain number of messages initially. If you need it to show more, scroll to the bottom of the list if messages and tap Load More Messages.
That should do it. You should now be ready to use your idComm email with your Android device.