• Link to Facebook
  • Link to X
Call 303-796-3000 or email info@sos4net.com today!
SOS4Net, Inc.
  • Home
  • Services
    • Web Design & Development
    • Our Web Design Process
    • Web Hosting & Domain Names
    • Local Search Management
    • Computer Repair & Cleanup
    • SOS4Net WebMail
    • idComm Webmail
  • Clients
  • Helpful Tips
    • SmarterMail’s New Look
    • Windows 10 v2004 Password Amnesia
    • idComm Email
      • idComm Home
      • Check Webmail
      • idComm Email Settings
      • How to Use the Spam Filter
      • Your Junk Email Folder
      • IMAP to POP3 in Outlook
    • Email w/Your Own Domain
      • Email Settings for Your Domain
      • How to Use the Spam Filter
      • Your Junk Email Folder
      • IMAP to POP3 in Outlook
    • Other Email Tips
      • Archiving Email
      • Help, My Inbox Is Full!
      • Email Max Message Size
      • Locate Your Outlook .PST File
      • Repair an Outlook .PST File
      • Outlook 2016 Duplication Bug
    • Mail Server News
    • Web Hosting Tips
      • FTP Port Number
    • Antivirus Tools
      • Program Downloads
      • Program Removal Tools
      • Avast Antivirus Setup
    • Windows Info
      • Windows 10 Upgrade
      • Windows 10 Privacy Info
      • Windows 10 Start Menu
      • Windows 10 Changes Default Browser
      • Windows 10 Rollback
      • Windows 8 Start Button
      • Windows 7 Upgrade Advisor
    • Check Your IP Address
  • Webmail
    • SmarterMail’s New Look
    • idComm
    • SOS4Net
  • Contact
  • Alerts
  • Click to open the search input field Click to open the search input field Search
  • Menu Menu

SOS4Net Inc.

Helpful Hints & Other Info - Email

If you need website design, development, maintenance, a domain name, web or email hosting, or computer repair and clean up, call 303-796-3000 or email info@sos4net.com today for your FREE consultation!

idComm Email
Settings for Windows Live Mail Desktop

PLEASE NOTE: If you came here from an alleged tech support site, please click here for important information regarding our NON affiliation with that site.

The instructions below apply to idComm.com email addresses.  They’ll tell you how to Add a New Account or how to Check/Fix an Existing Account.  PLEASE NOTE:  All entries should be made in lower case unless otherwise specified.


Add a New Email Account

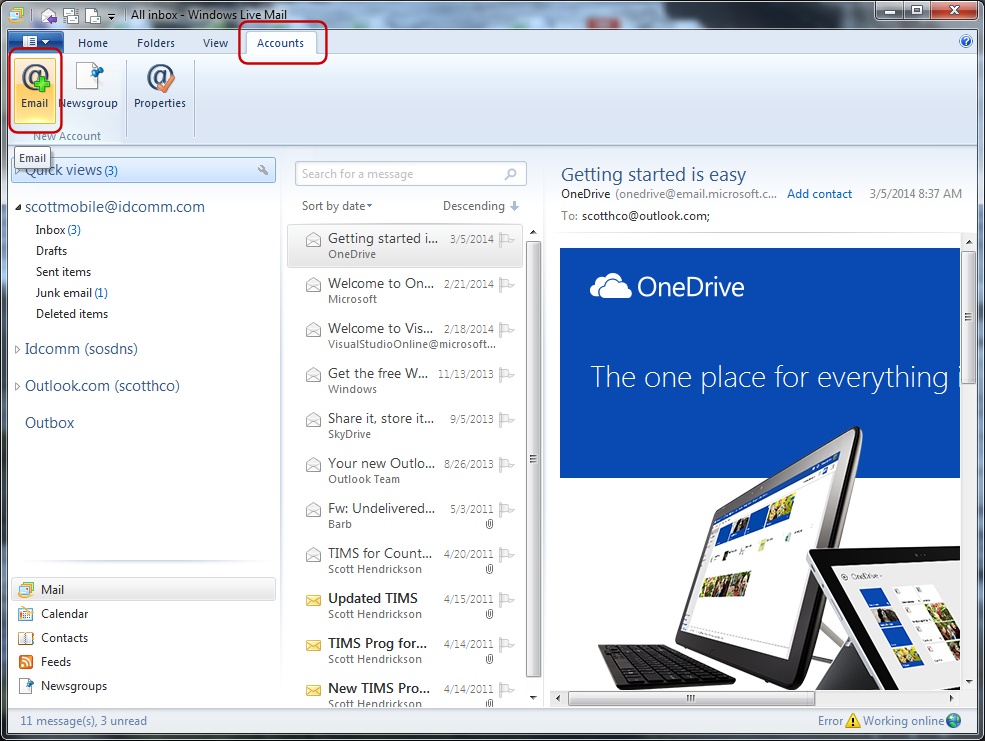
  • Open Windows Live Mail Desktop.
  • At the top, click the Accounts tab.
  • Click the Add Account button.

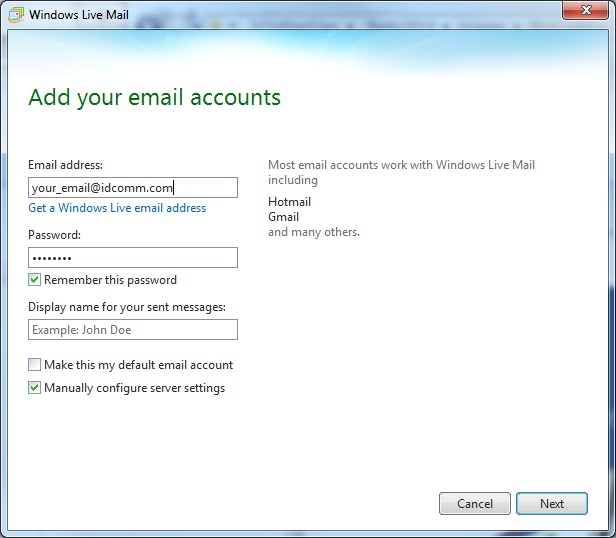
Add your email accounts

  • Enter your full email address.
  • Enter your password.
  • Make sure the Remember this password box is checked.
  • Enter a Display Name, usually your real name but can be a business name or anything you like.
  • At the bottom, check the box to Manually configure server settings.
  • Click Next.

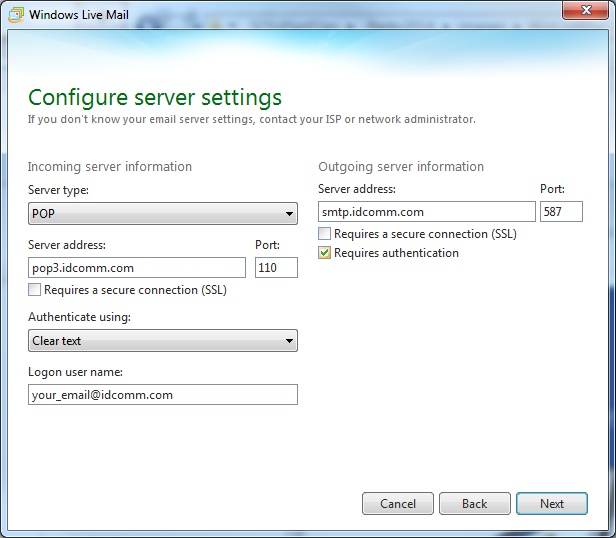
Configure server settings

Incoming server information

  • Server type should already be set to POP, which is correct.
  • Server address is pop3.idcomm.com.
  • Port should already be set to 110, which is correct.
  • Leave unchecked: Requires a secure connection (SSL)
  • Authenticate using: Clear text (should already be selected).
  • Logon user name is your full email address.

Outgoing server information

  • Server address is smtp.idcomm.com.
  • Port number is 587.
  • Leave unchecked: Requires a secure connection (SSL).
  • Check the box for Requires authentication.

Click Next

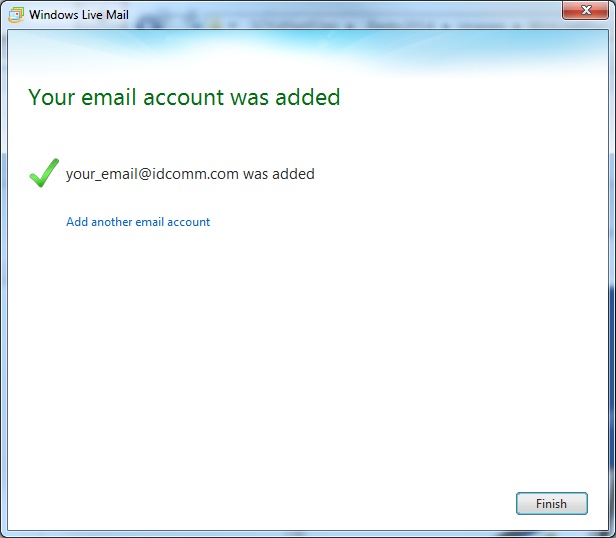
Your email account was added

Just click finish here unless you have another account you wish to add.

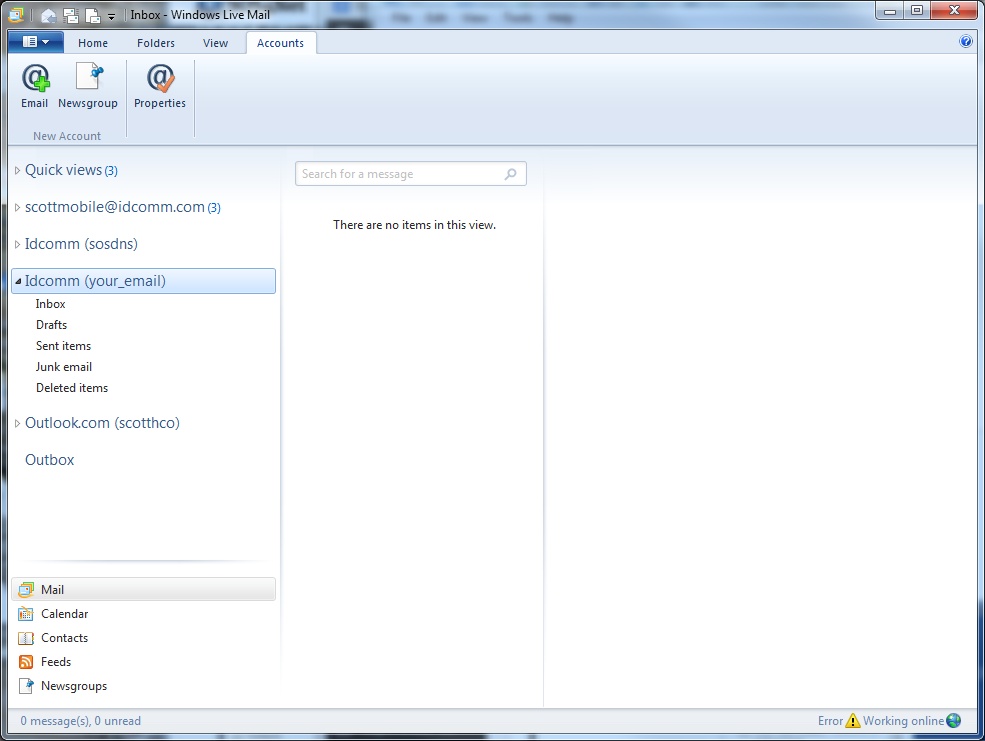
Your new account should now appear in the left column of the main Windows Live Mail window.

To Check/Fix Existing Account Settings

  • In the left pane where it shows your folders, right click the account itself (above the Inbox) and select Properties.
  • On the General tab under User Information, make sure your email address is correct.
  • Click the Servers tab.
  • Under Server Information, make sure both Incoming mail (POP3) and Outgoing mail (SMTP) are mailhost.idcomm.com
  • Under Incoming Mail Server
    • Make sure the Email username is your full email address.
    • Make sure the Password is there; retype it if you’re in doubt.
    • Make sure the Remember password box is checked.
    • Make sure Log on using clear text authentication is checked.
  • Under Outgoing Mail Server
    • Make sure the box is checked for My server requires authentication.
    • Click the Settings button, and make sure Use same settings as my incoming mail server is selected.
    • Click OK.
  • Click the Advanced tab.
  • Under Server Port Numbers
    • Set Outgoing mail (SMTP) to 465.
    • Check the box for This server requires a secure conection (SSL).
    • Set Incoming mail (POP3) to 995.
    • Check the box for This server requires a secure conection (SSL).
  • Under Delivery, check all 3 boxes, and set Remove from server after to 30 days.
  • Click OK.

You should now be ready to send and receive your mail.

MAIN PAGES

  • Web Design & Development
  • Web Design Process
  • Web Design Clients
  • Hosting & Domain Names
  • Local Search Management
  • Computer Repair & Cleanup
  • Home

HELPFUL TIPS

  • Email Tips & Info
  • Email Max Message Size
  • Antivirus / Antimalware Tools
  • Helpful Windows Information
  • Find Your IP Address

OUR COMPANY

  • Make a Payment
  • Late Fee Policy
  • Privacy Policy
  • Refund Policy
  • Contact Us

SOS4Net, Inc.

6824 S Dexter St
Centennial, CO. 80122

303-796-3000 Phone
303-796-3001 Fax

Email: info@sos4net.com
Copyright © 2007 - 2021  •  SO4Net, Inc., Centennial, CO.  •  All Rights Reserved
  • Link to Facebook
  • Link to X
Scroll to top Scroll to top Scroll to top